December 31, 2015

Bhindi pakoda recipe - Ladies finger pakora

Bhindi pakoda image
Bhindi pakoda recipe - Bhindi pakoda belongs to appetizer and snack category of Indian cuisine. The main ingredients are ladies finger and besan. Bhindi pakoda is one of the most easiest deep fried snack that you can make at anytime as ladies fingers are available throughout the year. 

Actually, I wanted to make kadai bhindi with the ladies fingers available in my refrigerator. But, the quantity of ladies fingers were very less and also I had to prepare evening snacks. First I thought to make onion pakoda. Later, I changed my mind and made this bhindi pakoda to utilize the ladies finger in a nice way. 

The pakoda was crispy and tasty. To get the pakodas crispy you have to fry it on low flame. One important thing is that it tastes best when served hot. Variations can be made with this pakoda by adding refined flour and corn flour. It tastes delicious with these ingredients.

Some other interesting pakoda recipes in this space

Bhindi Pakoda Recipe -Ladies Finger Pakora Recipe
ladies finger pakoda ready to serve
Prep time : 15 mins      
Cook time : 25 mins        
Total time : 40 mins
Recipe type : Appetizer-Snack  
Cuisine : Indian                
Serves : 2
Author : Vidya Chandrahas

Ingredients 
  • 1 cup gram flour / besan
  • 20 ladies fingers / bhindi
  • 2 tsp chilli powder
  • 3/4 tsp garam masala
  • 3/4 tsp ajwain powder
  • 1 tsp lemon juice
  • 3/4 tsp salt
Method
  1. Wash and pat to dry the ladies fingers. Chop off  tip and top of the ladies fingers. Then slice into two pieces.
  2. Put half of the besan into a large bowl. 
  3. Add 1/4 tsp of salt and mix well. 
  4. Coat the ladies fingers and remove them onto a plate.
  5. Add remaining besan into the same bowl. 
  6. Add chilli powder, garam masala, ajwain powder and remaining salt. 
  7. Add lemon juice and some water to make a thick paste.
  8. Dip the besan coated ladies fingers in this paste. 
  9. Heat oil i a pan and fry the above prepared bhindis on low flame until golden brown and crisp. 
  10. Serve the bhindi pakoda hot.
Bhindi pakoda - step by step pictures

1.  Wash and pat to dry the ladies fingers. Chop off  tip and top of the ladies fingers. Then slice into two pieces.
wash and slit the ladies fingers
2.  Put half of the besan into a large bowl. Add 1/4 tsp of salt and mix well. Coat the ladies fingers and remove them into a plate.
coat with besan
3.  Add remaining besan into the same bowl. Add chilli powder, garam masala, ajwain powder and remaining  salt.

4.  Add lemon juice and some water to make a thick paste. Dip the above prepared besan coated bhindis in this paste.
make paste of besan and dip the bhindis
5.  Heat oil i a pan and fry the above prepared bhindis on low flame until golden brown and crisp.
fry the bhindis until crisp
6.  Serve the bhindi pakoda hot.
ladies finger pakoda ready to serve

December 20, 2015

Anarse with rice flour and jaggery recipe - Atrasa - Kajjaya

Anarse in a serving plate
Anarse recipe -The basic ingredient of this sweet is fresh rice flour. Rice flour is prepared in a special way for this sweet. Rice is soaked continuously for three days by changing water each day. On fourth day, drain water and dry the rice under shadow. Make fine flour with this rice and use this rice flour for preparing anarse. Making anarse by using such rice flour makes it crispy and layered. Being fried in ghee, this sweet is high in calories and highly addictive. The poppy seeds adds extra taste and crunchiness to the sweet. Anarse is made during special occasion like Diwali and Ganesh chaturthi festival. Actually I made it during Diwali festival, but I couldn't post it at that time. It came out very well. It was crispy and reasonably sweet. You can add more jaggery if you like a more sweeter version. We all liked it a lot. Do try this anarse and I am sure that you will like it.

Some other interesting snack recipes in this space

Anarse Recipe - Atrasa Recipe - Kajjaya Recipe
anarse is ready to serve
Prep time : 8 hrs 20 mins
Soaking time 3 days
Cook time : 1 hour
Total time : 3 days 8 hrs 30 mins
Recipe type :  Sweet
Cuisine : North Indian
Yield : 20 Anarse
Author : Vidya Chandrahas

Ingredients 
  • 1¼ cup rice flour
  • 1/4 cup jaggery
  • 2 - 3 tbsp milk
  • Poppy seeds or khus khus as required
  • Ghee for frying

For the rice flour
  1. Wash and soak 2 cups of rice in sufficient water for 3 days. Change water on everyday. 
  2. On 4th day, drain water and spread the rice on a thin cloth and dry them under shadow. When the rice completely dries up, make smooth flour from it. 
  3. Use this flour as much as you like to make anarse and reserve the remaining flour for any other use. 
Method
  1. Put the rice flour in a large bowl. 
  2. Add the jaggery powder and mix well. 
  3. Add the milk if required and knead it to a smooth dough. Keep covered for 7 - 8 hours.
  4. Then knead the dough again to smooth for 4 -5 minutes.
  5. Take a small lemon sized dough and roll it to round ball shape.
  6. Coat one side of the dough ball with poppy seeds. 
  7. Place it on a rolling board and gently flatten it with your fingers to make a round shape or roll it with a rolling pin.
  8. Heat ghee in a small frying pan and slip the anarse slowly in it. 
  9. Fry on low flame until golden in colour and crisp from both sides.
  10. Drain ghee and allow them to cool.
  11. Store in an airtight container. 
Anarse - step by step pictures

1.  Put the rice flour in a large bowl. Add the jaggery powder and mix well.
Anarse recipe- step 1
2.  Add the milk if required and knead it to a smooth dough. Keep covered for 7 - 8 hours. 
Anarse recipe - step 2
3.  Then knead the dough again to smooth for 4 -5 minutes.Take a small lemon sized dough and roll it to round ball shape. Coat one side of the dough ball with poppy seeds.
Anarse recipe - step 3
4.  Place it on a rolling board and gently flatten it with your fingers to make a round shape or roll it with a rolling pin.
Anarse recipe - step 4
5.  Heat ghee in a small frying pan and when ghee melts, slip the anarse slowly in it
Anarsse recipe - step 5
6.  Fry on low flame until golden in colour and crisp from both sides
Anarse recipe - step 6
7.  Drain ghee and allow the anarse to cool. Then store in an airtight container.
anarse is ready to serve

November 17, 2015

Cabbage capsicum salad recipe

Cabbage capsicum salad in a serving bowl
Cabbage capsicum salad recipe - This is a healthy, tasty, crunchy and very easy to prepare salad made from cabbage and capsicum. For the dressing, lemon juice, sugar and salt is used, a simple dish that anyone can make. Cabbage is known as gobi in hindi. kobi in marathi, elekosu in kannada, and capsicum or bell pepper is known as dhobli mirchi in marathi, shima mirch in hindi, donne mensinkayi in kannada and fugge mirsaang in konkani.

This salad is low in calories and high in dietary fibers which keeps you satiated for a longer period. It is a perfect dish which can be prepared in a jiffy for lunch or dinner as a side dish. This can even be eaten as a whole meal  if you are on weight loss diet. It is a delicious salad with sweet and sour taste. Prepare this salad at least once in a week and skip adding sugar if you do not like the sweet taste in it. In case you would like to have it spicy you can use green chillies according to your taste and requirement.

Some other interesting raita reipes in this space

Cabbage Capsicum Salad Recipe
Cabbage capsicum salad ready to serve
Prep time :  10 mins    
Cook time : 0  mins    
Total time : 10 mins
Recipe type : Side dish
Cuisine :  Indian
Yield : Serves  4
Author : Vidya Chandrahas

Ingredients
  • 250 grams cabbage / gobi
  • 3 green capsicums / bell peppers
  • 2 medium sized lemons
  • 1 green chilli, finely chopped
  • 1 tsp sugar or as required
  • 1/2 tsp salt or as required
  • Fistful of chopped coriander leaves

Method

  1. Wash the capsicums and set aside. Separate the cabbage leaves and wash them thoroughly.
  2. Cut the capsicums into two halves and remove the seeds and rind. Cut the cabbage and capsicums into small pieces and set aside. 
  3. Squeeze the lime in a large bowl and add sugar and salt to it. Mix well till the sugar and salt dissolve in the lemon juice. 
  4. Add the capsicum and cabbage. Mix well. Add the green chilli and chopped coriander leaves. Mix well.
  5. Serve as a side dish to pulao, biryani, rice and rotis.
Cabbage capsicum salad - step by step pictures

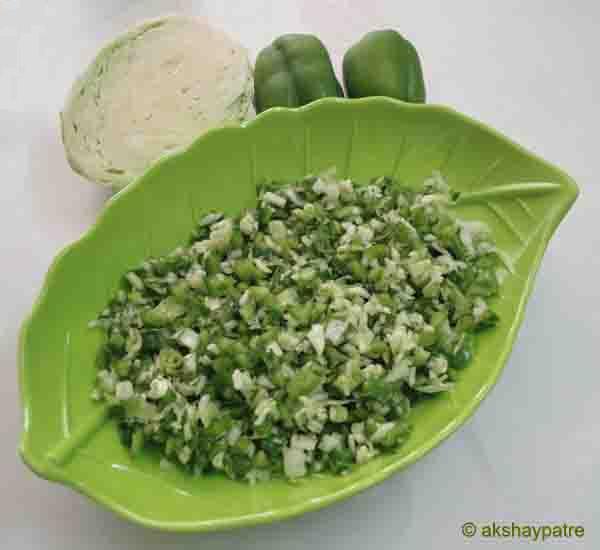
1.  Wash the capsicums and set aside. Separate the cabbage leaves and wash them thoroughly.
Wash the capsicums and cabbage
2.  Cut the capsicums into two halves and remove the seeds and rind. Cut the cabbage and capsicums into small pieces and set aside.
cut the cabbage and capsicums
3.  Squeeze the lime in a large bowl and add sugar and salt to it. Mix well till the sugar and salt dissove in the lemon juice. Add the capsicum and cabbage. Mix well.
squeeze the lime and add cabbage capsicums
4.  Add the green chilli and chopped coriander leaves. Mix well.
add coriander leaves
 5.  Serve as a side dish to pulao, biryani, rice and rotis.
Cabbage capsicum salad ready to serve

November 6, 2015

Plain sev recipe

Plain sev in a serving plate
Plain sev recipe - Here is  another delicious crispy snack which is made during Deepavali festival. Plain sev is often made with different versions in all over India for regular use as well as festive occasions. There are many variations of sev like potato sev, tomato sev, palak sev, plain sev etc. There are two versions of making plain sev.

In the first version, sev is made using only besan (split bengal gram flour) and in another version it is made by using rice flour in combination with besan. I have adopted the second method. Either way it tastes great. This is a simple and easy snack which requires only few ingredients which is readily available in the kitchen.

Usually, it is served with number of mouthwatering sweets like karanjidry fruits barfi,  badam barfidoodh pedabesan ladoowheat flour ladoorava ladoo and snacks such as khara sevtikhat shankarpali, sweet shankarpali and chakli. While preparing the dough for plain sev, make sure that it should not be too stiff or too watery. To make a crispy sev, you need to knead the dough to thick and smooth consistency.

Some other interesting snack recipes in this space
Plain Sev Recipe
Prep time : 15 mins    
Cook time : 15 mins    
Total time : 30 mins
Recipe type : Savoury Snack
Cuisine : Indian  
Author : Vidya Chandrahas

Ingredients
  • 2 cups split bengal gram flour / besan
  • 1/2 cup rice flour
  • 1½ tsp ajwain / carom seeds
  • 3/4 tsp salt or as required
  • 1 tbsp butter
  • Oil for deep frying

Method

  1. Grind the ajwain with 1/4 cup of water to a smooth paste. Transfer the paste to a bowl and set aside.
  2. Put the besan in a large bowl. Add the rice flour and salt. Mix well till both the flour and salt combine well.
  3. Add the butter and ajwain paste. Knead it to a smooth dough adding little bit of water.
  4. Take a chakli maker mould and fix small whole plate to it. Fill the above prepared dough till 3/4 part of the mould and fix the lid.
  5. Heat oil in a pan and press the sev directly in the oil. Fry the sev on low flame till crispy and golden in colour. Drain oil and allow it to cool. 
  6. When it comes to room temperature store in an airtight container. The plain sev can be stored for about 10 - 12 days.
Plain sev - step by step pictures

1.  Grind the ajwain with 1/4 cup of water to a smooth paste. Transfer the paste to a bowl and set aside.
ajwain paste to make plain sev
2.  Put the besan in a large bowl. Add the rice flour and salt. Mix well till both the flour and salt combine well.
besan and rice flour mixed
3.  Add the butter and ajwain paste. Knead it to a smooth dough adding little bit of water.
add butter and paste, then knead to a dough
4.  Take a chakli maker mould and fix small whole plate to it. Fill the above prepared dough till 3/4 part of the mould and fix the lid.
fill the mould with dough
5.  Heat oil in a pan and press the sev directly in the oil. Fry the sev on low flame till crispy and golden in colour.
Deep fry till golden colour
6.  Drain oil and allow it to cool. When it comes to room temperature store in an airtight container. The plain sev can be stored for about 10 - 12 days.

October 14, 2015

Baby corn manchurian recipe

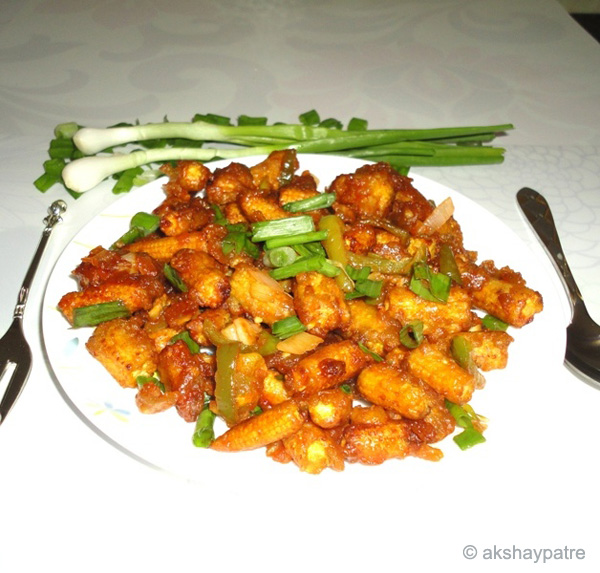
baby corn manchurian in a serving plate
Baby corn manchurian recipe - Today I am sharing with you all a very tasty and flavorful baby corn manchurian recipe. This is a delectable dish which you can have it as an appetizer. It is usually served before a meal as  the first course. Usually in chinese dishes ajinomoto is invariably used, however I have not added it while preparing this dish.

This mouthwatering manchurian tastes great when it is hot. This is  a perfect dish to please both small kids and adults. I have prepared the dry manchurians and served it as a starter. You can also prepare similar type of dish with vegetables like mushroom, cauliflower, cabbage in combination with carrot, but the method of preparation is slightly different than this. I'll post that too in due course. Manchurian is so popular in all parts of India and it doesn't need much introduction.

Baby Corn Manchurian Recipe
baby corn manchurian ready to serve
Prep time : 20 mins
Cook time : 30 mins    
Total time : 50 mins
Recipe type : Main Course
Cuisine : Indo-Chinese
Yield : Serves 2
Author : Vidya Chandrahas

Ingredients 
  • 30 baby corns
  • 5 spring onions
  • 6 cloves garlic, chopped
  • 1 capsicum / bell pepper
  • 2 tbsp tomato sauce
  • 3/4 tsp soya sauce
  • 2 tsp red chilli sauce
  • 1 tsp green chilli sauce
  • 1/2 cup corn flour
  • 2 tsp refined flour / maida
  • 1 heaped tsp mint /pudina and garlic paste
  • 2 tbsp oil + oil for frying
Method
  1. Wash the baby corns and put them into a large vessel. Pour sufficient water on it and add 1/4 tsp of salt. Boil them for 3 minutes. Drain water and cool the baby corns. Cut each baby corn into 3 pieces and set aside. 
  2. Wash and chop the spring onions and bulbs separately. Deseed the  capsicum and cut it into strips and set aside. 
  3. Put the maida and corn flour in a large bowl. Add 1/4 tsp of salt and 1/4 cup of water and make a thick paste. 
  4. Add the mint, garlic paste and mix well. Add baby corns and mix well. 
  5. Heat sufficient oil in a frying pan. Fry the baby corns on medium flame until golden brown and crisp. Drain the oil and set aside.
  6. Heat oil in another pan, add the chopped garlic and saute until aromatic. Add the chopped onion bulbs and saute until the bulbs are translucent. 
  7. Add the capsicums and saute for a while. Add the soya sauce, red chilli sauce, green chilli sauce and tomato sauce one by one and stir to combine. 
  8. Add the fried baby corns, the remaining maida, corn flour paste and salt. Stir continuously for 3 - 4 minutes on medium flame. 
  9. Add the spring onions and saute for a while. 
  10. Remove from the flame and serve the baby corn manchurian hot.
Baby corn manchurian - step by step pictures

1.  Wash the baby corns and boil them for 3 minutes in sufficient water along with 1/4 tsp salt. Then cut the baby corns into 3 equal pieces and set aside.

2.  Wash and chop the spring onions and bulbs separately. Deseed the  capsicum and cut it into strips.

3.  Put the maida and corn flour in a large bowl. Add 1/4 tsp of salt and 1/4 cup of water and make a thick paste.

4.  Add the mint, garlic paste and mix well.
Baby corn manchurian recipe - step 1
5.  Make a thick paste. Add more maida and corn flour to make it thick if  the paste is too watery. 

6.  Add the baby corns and mix well.

7.  Heat sufficient oil in a frying pan. Fry the baby corns on medium flame until golden brown and crisp. Drain oil and set aside.
Baby corn manchurian recipe -step 2
8.  Heat oil in another pan, add the chopped garlic and saute until aromatic. Add the chopped onion bulbs and saute until the bulbs are translucent. 

9.  Add the capsicums and saute for a while.

10.  Add the soya sauce, red chilli sauce, green chilli sauce and tomato sauce and stir to combine.

11.  Add the fried baby corns, the remaining paste and salt. Stir continuously for 3 - 4 minutes on medium flame.
Baby corn manchurian recipe -step 3
12.  Add the spring onions and saute for a while.
 spring onion added
13.  Remove from the flame. 
saute the manchurian
14.  Serve the baby corn manchurian hot 
baby corn manchurian ready to serve

August 6, 2015

Shenga usli recipe - Peanut usli - Ground nut usli

Shenga usli in a serving plate
Shenga usli recipe - Shenga usli is one of the most easiest evening tea-time snack that you can make with few ingredients. It has a delicate aroma of curry leaves interspersed with the smoky flavor of red chillies. Soak and boil the peanuts and then temper with your favorite ingredients, mix the coconut, garnish with cilantro and healthy usli gets ready within few minutes. 

I avoid onions in the usli when I serve it as fasting snack with tea or coffee. Otherwise tempering with onon also adds an extra flavor to the snack. Peanut has several names such as shenga, shengdana, moongfali, bhuimoog, bhunchane, kadlekai, earth nuts, monkey nuts, groundnuts etc. It contains protein which maintains and repairs body tissues.

It also provides energy to the body. Eating handful of groundnuts with a cup of milk is very beneficial for growing children.This is indeed a perfect recipe for you if you are looking for a healthy evening snacks or fasting snack recipe.This is similar to the sundal of Andhra Pradesh as I added coconut and tempered with red chillies, curry leaves and mustard seeds. 

Peanut is one such ingredient that I never forget to buy and store in my kitchen. Besides usli, I also make chutney powder and danyachi koot which is always handy. This is a very simple and flexible recipe to try with your own version. Sometimes for a change, I just prepare the usli and add any one of my favourite dish such as kande pohesusla  upma, etc. to serve my family.

Shenga Usli Recipe - Peanut Usli Recipe - Ground Nut Usli
Shenga usli is ready to serve
Prep time : 10 mins 
Cook time : 30 mins       
Total time : 40 mins
Recipe type : Breakfast
Cuisine : South Indian
Yield : serves 2
Author : Vidya Chandrahas


Ingredients 
  • 1 heaped cup of peanuts / shenga
  • 4 tbsp grated fresh coconut
  • 2 tbsp chopped cilantro (optional)
  • 1/4 tsp salt or as required
For the tempering
  • 2 dry red chillies, broken
  • 1 sprig curry leaves
  • 1/4 tsp mustard seeds (optional)
  • 1 tbsp oil or as required
Method
  1. Hand-pick the peanuts. Wash and soak with sufficient water for 6 hours. 
  2. Drain the water and add 2 cups of fresh water. Cook the peanuts in a pressure cooker till 3 whistles. 
  3. When the pressure releases, remove the container from the cooker, drain excess water and set aside.
  4. Heat oil in a pan and add mustard seeds. When they start sputtering add the red chillies and curry leaves. Fry till the red chillies turn light brown and aromatic. 
  5. Add the peanuts and salt to it. Saute for 2 minutes. Add the coconut and mix well. 
  6. Add the chopped cilantro and mix well. Turn off the flame and serve the shenga usli hot.
Note
  1. You can make similar type of usli with kabuli chana or white chickpea, brown chickpea, green gram or moong, dried green peas or vatana and split green grams or moong dal.
  2. Though the recipe seems very simple, it is worth a try as it is very nutritious.
  3. As a variation you can also mix the groundnut, kabuli chana,  green gram and peas together to make a usli with different taste and combination
Shenga usli - step by step pictures

1.  Hand-pick the peanuts. Wash and soak with sufficient water for 6 hours.
soaked peanuts
2.  Drain water and add 2 cups of fresh water. Cook the peanuts in a pressure cooker till 3 whistles. When the pressure releases, remove the container from the cooker, drain excess water.
boiled peanuts
3.  Heat oil in a pan and add mustard seeds. When they start sputtering add the red chillies and curry leaves. Fry till the red chillies turn light brown and aromatic.
tempering prepared to make  shenga usli
4.  Add the peanuts and salt to it. Saute for 2 minutes.
add boiled peanuts
5.  Add the grated fresh coconut.
add fresh coconut
6.  Saute for 2 minutes.
mix the coconut with peanuts
7.  Add the chopped cilantro and mix well.
add coriander leaves
8.  Turn off the flame.
mix the cilantro
9.  Serve the shenga usli hot.
Shenga usli is ready to serve